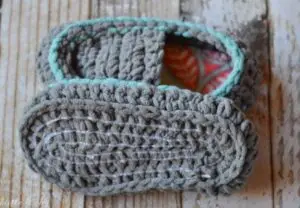
 Everyone loves a pair of handmade, comfy crochet slippers. But no one likes feeling like they’re about to slide right out of them eve y time they take a step. It can be a real bummer when you’re walking around your house and feel like the bottoms of your slippers might be more slick than non-slip.
If you’ve been in this situation before, don’t give up on the dream of a stable crochet slipper!
There are plenty of tricks you can try to keep your slippers from sliding around underfoot. Here are seven ways to make crocheted slippers non-slip.
Another interesting read:
Best Women’s Comfy Non-slip Slip-on House Slippers For Elderly Ladies
Best Non-slip Slippers for Toddlers
The 10 Best Safe Non-Slip Slippers For Elderly Women Reviews
How to Make Crochet Slippers Non-slip?
1. Use hot glue
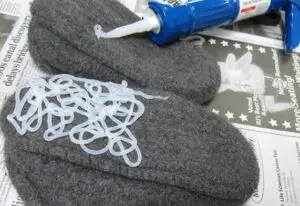
Hot glue is ideal for this application because it dries quickly and forms a strong bond. In addition, the adhesive on the hot glue strip will keep your slippers from slipping on smooth surfaces like tile or hardwood floors.
Simply run a line of hot glue around the bottom of each slipper, and allow it to dry completely. The glue will create a tacky surface that will help keep your feet in place.
Note:
Hot glue can be messy to use, and it’s possible that you could burn yourself if you’re not careful. Also, the adhesive will wear away over time, which means you’ll have to reapply it from time to time.
2. Add non-slip dots to the bottoms
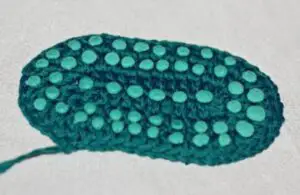
Non-slip dots make crochet slippers non-slip because they add surface area to the bottom of the slipper. This increased surface area creates more friction between the slipper and the floor, which prevents your foot from slipping out of the slipper.
There are a few ways to apply the non-slip dots to your crochet slippers. The most common way is to simply stick them on the bottom of your slippers. However, you can also sew them on or use fabric glue to attach them.
Note:
When you sew the non-slip dots onto your crocheted slippers, it adds a little thickness and stiffness to the bottom of your slippers. This might be good for stability, but it could make them too stiff to be comfortable to walk in.
3. Try a rubber bottom
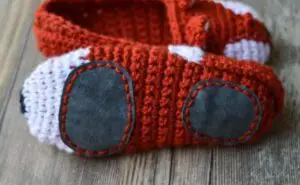
Rubber soles on crochet slippers ma e them non-slip because of their texture. The rubber sole is textured so that your foot can better grip the ground.
This application method is most commonly done by crocheting around a rubber sole. You simply crochet a rectangle, attach it to the bottom of your slippers with a running stitch, and then cut the rubber sole down to size.
Note:
Crocheting around a rubber sole requires a lot of careful planning and pattern writing. The rectangle you crochet has to fit perfectly without leaving too much excess fabric. If you’re not careful, this might lead to seams that are too weak or large to be effective.
4. Use silicone caulk
![]()
Silicone caulk makes crochet slippers non-slip because it provides a lot of grips. The caulk texture provides friction against the floor, which prevents your foot from slipping.
You can apply the caulk to your slippers just like you would any other textured surface. Simply spread a little bit of silicone over the entire bottom of your slippers, and allow it to dry completely.
Note:
Caulk can be messy to work with, and it doesn’t look particularly nice on crochet slippers. If you don’t apply the caulk perfectly, the texture will be uneven or lumpy.
5. Paint on non-slip paint/coating
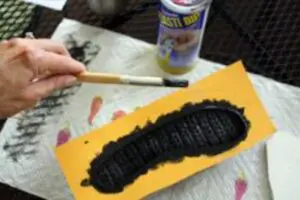
Non-skid paint makes crochet slippers non-slip because it provides a textured surface on the sole of your slippers. The texture creates friction on the ground, which prevents your foot from slipping.
Simply apply a coat of paint to the bottom of your slippers, allow it to dry thoroughly, and then apply another coat. Continue until the entire bottom slippers are covered in paint.
Note:
Painting on non-skid paint is labor-intensive. You’ll have to apply multiple coats of paint, wait for it to dry, and then reapply it.
6. Sew on felt pads
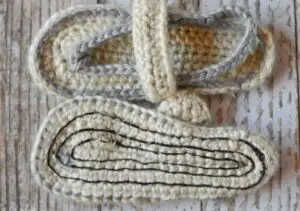
Felt soles on crochet slippers make them non-slip because they’re slightly raised and textured. The bottom of your slippers will have tiny little bumps that create extra friction with the floor, and this prevents your foot from slipping.
You can apply felt pads on your slippers by sewing them on, or you can attach them with fabric glue. Simply cut out a piece of felt that is slightly larger than the bottom of your slippers, and then sew it on or attach it with glue.
Note:
Felt pads generally aren’t very thick or firm – they’re more for comfort than for stability.
7. Use plastic dip
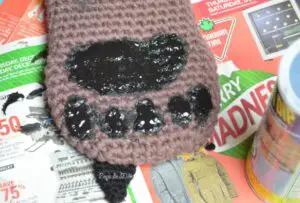
The plastic dip is a liquid that coats the surface to give it non-slip properties. It dries quickly and is easy to apply.
You can use plastic dip on the bottom of your crochet slippers just like you would use paint. Simply take a small sponge brush, dip it in the liquid, and then paint the bottom of your slippers with it. Allow the dip to dry, and then repeat for an even coat.
Note:
Plastic dip can be difficult to remove, and It also doesn’t come in many different colors – usually just clear and black.
FAQ:
How do you make kids’ slippers non-slip?
The most commonly used method is to sew on felt soles, which makes kids crochet slippers non-slip because the bottom has tiny little bumps that create extra friction with the ground.
Conclusion
Making crochet slippers non-slip is easy to do since there are so many options. The most common way is to use some sort of non-slip rubber material.
You can also use caulk, paint, felt pads, or plastic dip. Each method has its own benefits and drawbacks that you should consider before choosing which one is right for you.
The best thing you can do is experiment with the different methods and see what works best for you and your crochet slippers.
