Slippers, as with any other piece of footwear, will at one point in time wear out and require some repairs. That is given the strenuous chore it performs insofar as the facilitation of your walking and transportation is concerned. It is hence necessary that you know how to repair slipper soles.
You never know when exactly a circumstance that warrants a repair might arise. Being cognizant of that very fact, we decide to draft and belabor the subject in the proceeding conversations. All you should do is stay with us till the end to gain that insight.
What Do You Need?
You will need the following gears to actualize this repair exercise:
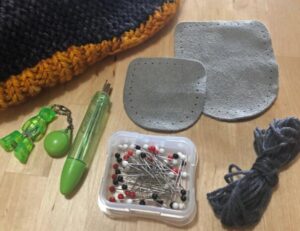
- Clamps or elastic bands
- A heat gun or hairdryer
- Nail polish remover
- Pliers
- Rough sandpaper
- Round brush
- Rubber or stick-on soles
- Shoe repair glue
8 Simple Steps on Repairing Slipper Soles
Now follow the procedures stipulated hereunder to implement the strategy:
Step I: Pull the old soles away
It all begins by pulling away from the old soles. Use a set of pliers to tackle this job. Be careful and slow as you do this to avoid inflicting harm to the unaffected parts of the pair of slippers. In case you experience any difficulties, you may have to use a hand dryer or a heat gun.
Step II: Get rid of the old glue remnants
Proceed now to get rid of the remnants of the old glue successfully. This may require the use of the nail polish remover. It neutralizes the hardness of the old glue and makes the same weak enough to allow for the successful elimination thereafter. Use moderate quantities to save on money.
Step III: Scour the bottom
Scour now the bottom of the sole of the slippers using rough sandpaper. Do the same also for the new sole which you would wish to put in the place of the existing one. This procedure is necessary to enable the twin surfaces to retain the glue exceptionally well.
Step IV: Pour some glue into the surface
Pour some glue into the two surfaces which you scoured in the procedures above. Use the round brush to do so. While at it, be careful to spread the glue uniformly so that no patches are left behind. Leave the glue to dry out after this to allow the parts to harden completely.
Step V: Press the sole firmly onto the base of the slippers
Press the new sole firmly onto the base of the pair of slippers. Some glues do require heat to react and harden. If this is the case, be sure yet again to furnish this heat by use of the hairdryer and the heat gun. Be moderate with the amount of heat you provide as too much may pose irreversible damages.
Step VI: Tighten the edges
After the glue has dried and hardened, you should tighten the edges to make the new sole hardly pressed. Use a set of clamps or any other elastic bands to do this task. After you are through with this procedure, you should leave the slippers in the exact-same conditions for a duration of 24 hours.
Step VII: Eliminate excess rubber
At this stage, the pair of slippers comprise some excess rubber. Make use of a cutting knife or any other cutting tool to eliminate these excesses. Work around the edge of the slippers by holding the blade square in line with the welt. Follow the welt diligently as you work around the pair of slippers.
Step VIII: Lay the final touches
You are almost done with the exercise. Before calling it a day. Clean the sole and the entire slippers. Pull back the sole as well as you apply the final touches of the glue. Clamp the pair of slippers and hammer the same to see to it that all the parts combine perfectly. Leave the pair unattended for some time to allow it to dry harder.
Conclusion
Repairing a pair of worn-out slippers is not too difficult a task as you may deduce from the foregoing explanations. All you have to do is exercise a great deal of due diligence to have it right. Reading and adhering strictly to the tips of how to repair slipper soles above will certainly help you out.